
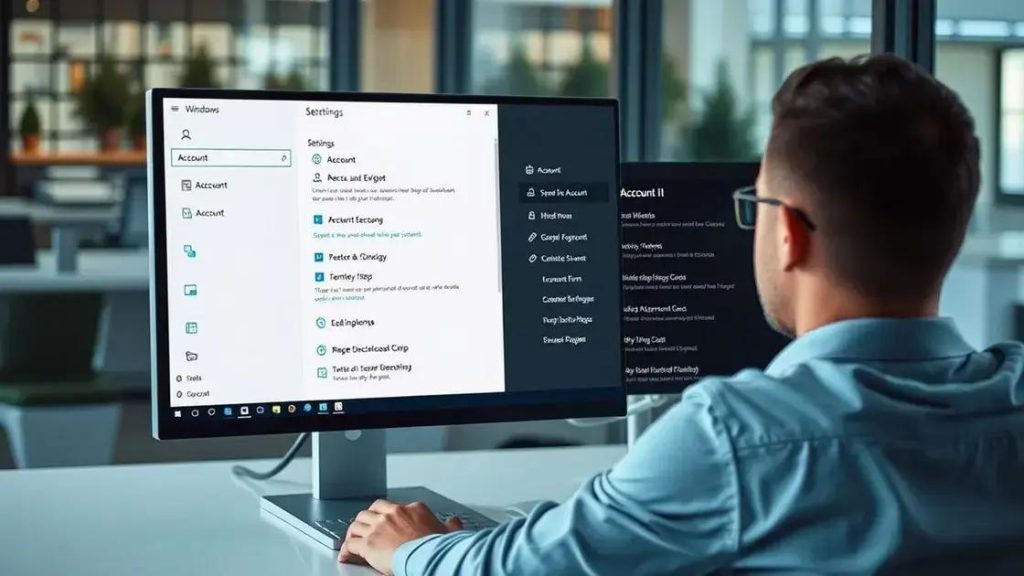
To set up accounts in Windows 11, users can choose between local accounts for privacy or Microsoft accounts for seamless integration with online services, with options to bypass account setups during installation.
If you’re encountering hurdles with Windows 11 account setups, you’re not alone. Many users are looking for ways to bypass the Microsoft account requirement while installing Windows 11.
understanding Windows 11 account setup

Understanding the Windows 11 account setup is crucial for a smooth installation experience. When you first install Windows 11, you are presented with the option to use a Microsoft account or a local account. A Microsoft account offers seamless integration with various Microsoft services, while a local account lets you operate your computer without needing to be online.
Choosing Between Account Types
If you choose a Microsoft account, you can access features like OneDrive and Microsoft Store applications easily. However, some users prefer the privacy and simplicity of a local account. To make this choice, consider whether you prioritize convenience or privacy during your usage.
Step-by-Step Account Setup
During the installation, you will first need to connect to Wi-Fi. When prompted for an account, select the option for a local account if you wish to go that route. You can later add a Microsoft account post-installation if needed. Follow the prompts to set up your username and password.
Benefits of Using a Microsoft Account
Using a Microsoft account links your device to the cloud, which allows for easy file access and synchronization. Password recovery options are also more straightforward, enhancing account security. Consider this if you regularly switch between devices.
Considerations for Local Accounts
Local accounts are limited in their integration with Microsoft services, but they provide an additional layer of privacy. They store your files and settings locally, which means you will need to manage backups manually. Evaluate your usage habits to determine which option suits you best.
Resources for Troubleshooting
If you encounter issues during account setup, Microsoft offers several resources, including forums and customer support. Always check for updates that might impact your account setup process to ensure you have the latest features and fixes.
exploring local vs Microsoft accounts

When setting up Windows 11, you have a choice between two main types of accounts: local accounts and Microsoft accounts. Each type has its unique features and benefits that cater to different user needs.
Local Accounts
A local account allows you to use your computer without connecting to the internet. This type provides more privacy because your personal data is stored locally rather than in the cloud. You simply create a username and password, making it easy to access your system.
Microsoft Accounts
Conversely, a Microsoft account provides several benefits, including cloud storage through OneDrive and synchronization of settings and applications across devices. By linking your Windows device to this account, accessing Microsoft services becomes much easier and more integrated.
Privacy Considerations
If you value privacy and prefer to control your personal data, a local account might be the better choice. However, if you often use multiple devices and prefer convenience, a Microsoft account can enhance your experience.
Usage Scenarios
For individuals who solely work on a personal laptop with infrequent internet use, a local account would suffice. On the other hand, if you’re a student or a professional who needs to access files and applications remotely, a Microsoft account offers significant advantages.
Switching Accounts
Should you decide to switch from one type of account to the other, Windows 11 allows you to do so easily. You can add a Microsoft account to a local account later on or revert back, providing flexibility based on your evolving needs.
steps to bypass account setups

Bypassing account setups in Windows 11 can save time and simplify the installation process. Here are the steps to achieve this efficiently.
Preparing for Installation
Before starting, ensure you have a reliable internet connection if you plan to use a Microsoft account. However, if you intend to bypass this entirely, having your device offline will be beneficial.
Starting the Installation Process
Begin the installation by booting your PC from the USB or installation media. Follow the on-screen prompts until you reach the account setup section.
Bypassing the Microsoft Account Requirement
When prompted to enter an email for the Microsoft account, look for the option that says “Offline Account” or “Limited Experience.” Selecting this will allow you to proceed with a local account instead.
Setting Up a Local Account
Next, create your local account by entering a username and password. This local account will give you access to your computer without needing to sign in online.
Completing the Installation
Once your local account is created, continue through the setup process, customizing your preferences like privacy settings and choosing your background. After completing these steps, you will have a fully operational Windows 11 without a Microsoft account.
troubleshooting installation issues

If you encounter issues during the Windows 11 installation, troubleshooting steps can help you resolve problems quickly. Here are common issues and how to fix them.
Common Installation Errors
Some users may experience errors during installation, like ‘Windows cannot install required files.’ This can occur due to problems with the installation media or hardware.
Checks Before Installation
Ensure your PC meets the minimum system requirements for Windows 11. Additionally, verify that the installation media is correctly created and not corrupted. Use tools like the Windows Media Creation Tool for a reliable download.
Disk Space Issues
Insufficient disk space can halt the installation. Before you start, check to ensure you have enough free space on your hard drive. Clearing up temporary files or using disk cleanup utilities can help.
Driver Compatibility
Sometimes, outdated drivers can prevent a smooth installation. Make sure all necessary drivers are updated, especially for critical components like the graphics card and storage controllers.
BIOS Settings
Incorrect BIOS settings can also cause installation issues. Ensure that Secure Boot is enabled and that your boot order is set to prioritize the installation media. If you encounter problems, consider resetting the BIOS settings to default.
Getting Help
If issues persist, consult the official Microsoft support website or community forums. Many users share experiences that provide solutions to similar problems.
future of account requirements in Windows

The future of account requirements in Windows 11 and beyond is shaped by a blend of security, user convenience, and evolving technology. Understanding these trends can help users adapt to upcoming changes smoothly.
Increased Focus on Security
As cyber threats grow, Microsoft is likely to enhance security measures for user accounts. This could mean additional verification steps during setup or logins, particularly for Microsoft accounts.
More Options for Users
Users can expect more flexibility in choosing account types. The balance between local and Microsoft accounts may shift to accommodate different user needs, especially as many individuals seek increased privacy.
Integration of AI Technologies
AI is expected to play a greater role in managing account security. For instance, machine learning could help detect unauthorized access attempts, streamlining the login process while enhancing safety.
Seamless Multi-Device Experiences
As technology progresses, integrating user accounts across multiple devices can become smoother. Microsoft may enhance synchronization features, allowing users to easily switch between devices without losing important settings and files.
Ongoing Feedback and Updates
Microsoft frequently updates its policies based on user feedback and tech advancements. Staying engaged with these updates will ensure that users can take full advantage of new features and security enhancements.
In summary: Understanding Windows 11 account setups
Setting up and managing accounts in Windows 11 can seem complicated at first, but knowing your options makes it easier. Whether you choose a local account for privacy or a Microsoft account for convenience, each has its benefits.
By learning to bypass account requirements and troubleshoot common problems, you’ll ensure a smoother installation process. The future of account management is bright, with security advancements and better integration on the horizon. Staying informed will help you make the most of your Windows experience.
Embrace these changes and feel confident in managing your accounts effectively in Windows 11 and beyond.
FAQ – Frequently Asked Questions about Windows 11 Account Setups
What types of accounts are available in Windows 11?
Windows 11 offers two main types of accounts: local accounts and Microsoft accounts, each providing different features and benefits.
How can I bypass the Microsoft account requirement during installation?
To bypass the Microsoft account requirement, you can select the option for ‘Offline Account’ during the setup process, allowing you to create a local account instead.
What should I do if I encounter installation errors?
If you face installation errors, check for sufficient disk space, ensure drivers are updated, and verify that your installation media is not corrupted.
Are there any benefits to using a Microsoft account?
Yes, a Microsoft account allows for easy access to cloud services like OneDrive, and it enables synchronization of settings across devices, enhancing user experience.
Can I switch from a local account to a Microsoft account later?
Yes, you can add a Microsoft account to your local account after installation, allowing you to take advantage of its features at any time.
How can I keep up with future changes in account management?
Stay informed through official Microsoft sources and community forums, as they provide updates on changes and improvements in account management for Windows.
 Mini PC: Unleash Powerful Performance in a Compact Design
  Windows update: avoid the taskbar nightmare and reboot loops
  Data recovery: How to restore lost partitions easily